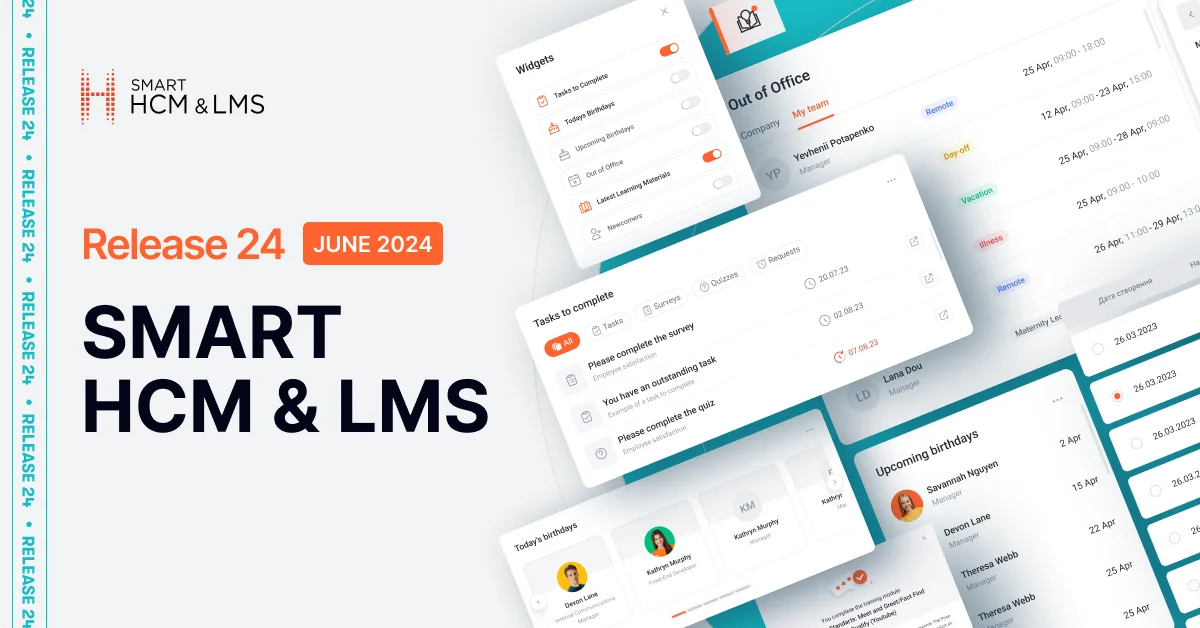
Main page interface update
What was done?
The main page of the self-service portal is the page that is most often visited by portal users and, accordingly, it should be informative and easy to use. In the new release, the main page of the self-service portal in SMART HCM & LMS has been redesigned and updated. Changes include a new design, the addition of new information areas, and the ability for users to customize their page using widgets.
How does it work?
After authorization, the portal user is taken by default to the main page of the portal, which, in addition to the standard areas of the previous version of the page – “Tasks to complete” and “Latest training materials” – contains new areas:
Newcomers – contains information about employees hired over the last 2 months.

Upcoming Birthdays – shows a list of people who have their birthdays in the next 3 weeks.
Out of Office – displays a list of employees who are absent in the current month. The area contains only approved requests (“Absence”) stored in the system.

By default, the data in the area is displayed for the entire company, and when you click the “Team” button, only for colleagues, that is, employees.By clicking the “View in Calendar” button, you can see information about planned and completed absences for any period:

Today’s Birthdays – shows the list of employees celebrating their birthdays today:
For personalization purposes, each user can independently customize the page to suit their needs:
By clicking the “Add Widget” button, select blocks of information to be displayed on the page:

Also, use the control buttons to set the location of the widget on the page:

The main page settings are saved in the system after the portal is closed, and upon returning, the user will have access to the page according to the latest settings.
Who will find it useful?
All users of the self-service portal.
Additional options and features
Tasks from the “Tasks to Complete” area open in separate browser tabs, which allows the user to work with several tasks simultaneously:

When you hover the cursor over an employee’s photo, their contact information is displayed with the ability to copy the contact. This simplifies and optimizes the process of communication with a colleague through the portal:

In the upcoming releases, the page will be updated with new widgets. Stay tuned.
New “Knowledge Base” module
What was done?
A new “Knowledge Base” section has been created in the self-service portal of SMART HCM & LMS, where employees can quickly find the necessary information using the search functionality by keywords, tags or filters.
How does it work?
The portal user navigates to the “Knowledge Base” section, the “Catalog” tab:

The page contains a list of links to materials that can be posted on the self-service portal, internal and external company resources, or on public resources on the Internet. To quickly find the necessary information, the user can use filters:
- by types,
- by skills,
- by languages.

Or search by keywords in the title or description of the material, or by tags:

By clicking on the found material, the employee views additional information and uses the “Go to” button to navigate to it using the link:

Records in the knowledge base are managed on the “Administration” tab of the “Knowledge Base” section:

To create a new record in the knowledge base, the portal user must have access to the “Administration” tab, where, after going to the page, they click the “Add” button. On the “Creating a new element” page, fill out information step by step, namely:
- In the “Parameters” area, select a data type from the drop-down list and indicate a link to the material. If necessary, in the “Cover” area, upload a material image file. After that, the page displays fields for filling out the title and description.

- Next, the user specifies tags by selecting from the list or creating a new one:

- Additionally, for the convenience of searching for information using filters, the user can add skills and languages from the general directory:

- The saved material will be displayed on the “Catalog” tab of the “Knowledge Base” section and will be available to all users.
Irrelevant material can be deactivated by clicking the appropriate button:

Deactivated material is not displayed on the “Catalog” tab and is not searchable.
It is important that the Knowledge Base functionality is completely a portal solution which is administered only through the self-service portal.
Who will find it useful?
The new “Knowledge Base” section will be useful to all company employees, providing quick access to important information. Users with appropriate access rights can share knowledge and update information.
Why is it convenient?
Efficient Search: Using key fields, tags and filters, employees can quickly and effortlessly find the information they need.
Centralized knowledge storage: All important information is now stored in one place, making it easier to access and manage.
Simplified filling of the knowledge base: Users with appropriate rights can easily add and update information, ensuring that data is current and accurate.
Additional options and features
Categorization: Information can be structured into categories, making navigation and search easier.
Tags and Filters: Ability to use tags and filters to refine your search.
Updated player for training materials
What was done?
The training materials player is designed in accordance with the general design of the self-service portal using React technology, which allows it to be integrated into the interfaces of other systems. This made it possible to expand the list of material formats supported by the player, modify the process of completing training and saving results, optimize the functionality of transition between modules, and make navigation within a learning course or plan user-friendly.
How does it work?
The self-service portal user navigates to the player page:

The player of the new version of the release supports the following formats:
- SCORM of versions 1.2 and 2004, with .zip files,
- Video files with.mp4, .webm, .ogg, .mkv, .3g extensions,
- Audio files with.mp3, .wav, .ogg, .flac, .aac extensions,
- PDF files and MS Office PowerPoint, Word, Excel files: .pdf, .pptx, .ppt, .docx, .doc, .xlsx, .xls,
- Online YouTube videos.
When viewing the learning material, the portal user can view the structure of the learning course or plan by clicking the “Content” button:

On the Content page, in addition to the structure and progress of the training, the user can go to any available learning module or return to the learning course or plan page:

If the module contains additional materials, you can view them using the “Additional Materials” button:


As in the previous release, the results of each attempt to review the training material are saved in the “Session” record of the Dynamics interface. At the same time, in the new release, the mechanism for saving results has become more efficient. When a portal user opens the player, the system creates a “Session” record in the “Active” status. If the user completes the training or closes the player, the Session changes its status to “Inactive”. This allows the module Administrator not only to control the process of training by employees, but also to monitor the activity of users passing training.
A learning module of any type is completed only upon clicking the “Complete” button. By default, the button is not active on the player page and becomes available only after the learner has achieved the learning goal: completing SCORM tasks, watching a video or listening to an audio material, etc.


Depending on your settings, the completion process may only contain confirmation of completion and transition to the next training module:

Or additionally contain the stage of assessing and providing feedback upon completion of the material:


Based on user ratings, the system calculates a rating of learning templates, which helps other users make decisions when choosing training in the catalog for self-assignment:

Importantly, the assessment and feedback process is part of the training completion process and if it is interrupted, the learning module does not proceed to completion. In this case, the user must go through the assessment and feedback process again for the system to record the completion status.
The changes also affected the process of taking quizzes and surveys. The quiz and survey start page contains general information and conditions for successful completion:

And the final page shows the results of the attempt depending on the parameters:

This made it possible in the new release to abandon the tags that were used to display dynamic information about quiz results on the initial and final pages of a quiz or survey.
Also, at the beginning or after completion of an attempt, the user can view the results of all attempts by clicking the “Attempts Result” button, which allows them to make the right decision on confirming the result and completing testing:

Who will find it useful?
Participants in remote learning and online testing, developers and authors of courses using SCORM formats, Administrators of the “Remote learning and online testing” module.
Simplified creation of learning materials templates and adding materials to the library
What was done?
The process for creating learning materials templates and adding materials to the library has been streamlined. Now the administrator of the “Remote learning and online testing” module needs to complete just 7 steps to create a learning module template and upload the material.
How does it work?
The module administrator creates a new “Learning Module Template” record. If the record was created through the “Learning Course Template” form, then the form contains a field with the name of the associated course.
Fields are filled out in several stages. First, the administrator fills out general information about the module, such as title, duration, and description, and selects a method for adding material from the “Material” list. When selecting values that require a file to be uploaded:
- Upload SCORM (1.2, 2004),
- Upload a video,
- Upload an audio,
- Upload a document (PDF, PowerPoint, Word, Excel),
An upload area appears on the form containing a list of file extensions available for upload.
While the record is not saved, the administrator can change the file by deleting it and uploading a new one.
If it is necessary to upload a video from YouTube, in the “Material” field, the administrator selects “Add online video (YouTube)”. The link to the online video is specified in the “Online Video URL” field.
In case of selecting the following options:
- Add existing quiz,
- Add existing survey,
- Add existing material,
The administrator must select a previously created quiz/survey record or material from directories in a separate field.
After selecting the material and filling out additional parameters, the module administrator saves the learning module template record by clicking the “Save” button. The system performs the following actions independently in the background:
- Creates a “Material” record of the appropriate type,
- If a file is selected, it uploads it to the blob storage where all the learning materials are stored,
- Establishes all necessary connections between records and synchronizes them into the portal database,
- Displays the result on the learning module template.
Important: if necessary, after saving the learning material template and creating a “Material” record, you can change the uploaded material only through the created “Material” record.
At the last stage, the module administrator specifies additional parameters for displaying the module on the portal, its passing and completion.
Who will find it useful?
Administrators of the “Remote learning and online testing” module.
Why is it convenient?
Optimization of the process of creating templates for learning modules and uploading files into the system.
New learning event management capabilities – speaker and organizer will be able to mark attendance and give grades to event participants
What was done?
Users of the portal who are speakers or organizers of a corporate event session, during the event or after its completion, can use the self-service portal to assess the participants of the event and record their attendance.
How does it work?
The portal user sees the “Participant management” tab on the event session page. The tab is available only to users with a “Speaker” or “Organizer” participant type in the session.

On the tab, the user has access to the functionality of recording attendance of event participants, assessing the participant’s level of participation and involvement in the event by adding a comment:

The entered data is immediately saved in the system and is available to the module administrator on the “Event Participant” form in the Dynamics interface.
Who will find it useful?
Administrators of the Event Management module, users of the system who act as speakers and organizers of corporate and training events.
Why is it convenient?
Recording attendance, assessment of event participants by speakers and organizers in a convenient form directly on the portal without providing access to the Dynamics interface.
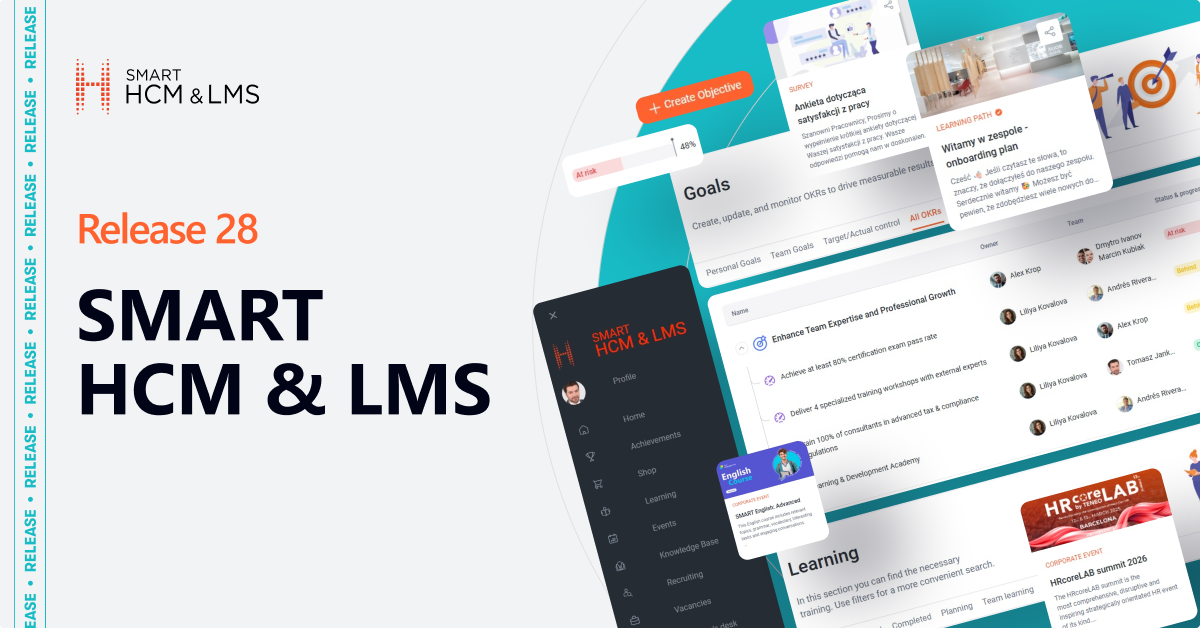
Report on team goals linked to strategic goals
What was done?
A strategic goal is the main guideline for the company in the long term. Monitoring their implementation helps ensure the company achieves the desired results.
The manager now can see the contribution of their subordinates to the achievement of the company’s strategic goals.
How does it work?
- On the “Team Goals” page, the manager clicks “Strategic Goals”:

- The page will display the following information:
- The name of the strategic goal,
- The list of the manager’s administrative subordinates whose goals are linked to the strategic goal of the company,
- Employee goals’ fulfillment result.

- In the “Completion by employee’s goals” column, the following information will be displayed:
- Plan.
The parameter indicates that the subordinate must complete the goal 100% to help the company achieve the strategic goal. - Expected Result.
The parameter shows the percentage of the strategic goal that should be achieved as of the current date. - Fact.
The parameter shows the percentage of employee’s actual fulfillment of their goal linked to the strategic goal.
- Plan.

- The “Completion by employee’s goals” column will also display the goal fulfillment status:
- “On track” – this means that the “Fact” is greater than or equal to the “Expected Result” parameter.
- “Behind” – this means that the “Fact” is by 10% less than the “Expected Result”.
The subordinate has almost achieved their goals. - “At risk” – this means that the “Fact” is significantly less than the “Expected Result”. The subordinate does not have time to complete their goals before completing the strategic goal.

Who will find it useful?
It will be useful for managers to control and understand that the actions of subordinates are aimed at achieving strategic goals.
Why is it convenient?
Helps identify deviations from strategic goals. Helps make informed decisions on resources, priorities, and strategic directions.
This also affects employee motivation. Subordinates see that their efforts contribute to the achievement of strategic goals, which motivates them to work effectively.
Adding positions to the goal template has become even more convenient
What was one?
It has become more convenient to create lists of positions to which goals should be assigned.
Now it is possible to add positions using the usual view.
Why is it convenient?
It is possible to:
- Filter and sort positions by any required field and criterion,
- Add many positions at a time, which reduces the time for generating a list of positions and creating goal templates.
How does it work?
- On the goal template form, click the “Add Positions” button.The form for selecting positions is displayed.
- Filter positions by the required field and criterion.
- Select all filtered positions into the general list of positions.
- Add selected positions to the goals template.
Additional options and features
It is possible to customize your view and add it to the position selection.
“Internal vacancies” – new section of the self-service portal
What was done?
A separate “Vacancies” section has been created on the self-service portal, containing a list of vacancies open to search for internal candidates, and the ability to launch a program for recommending employees within the company.
How does it work?
The user of the self-service portal goes to the “Vacancies” section, where a list of vacancies is displayed:

The list of vacancies on the page is managed in the same way as on other career search sites, through publication. To do this, a recruitment specialist in Dynamics creates a “Vacancy Publication” record with “SelfServicePortal” specified as the recruiting channel. As with other channels, a specialist can edit the text of the vacancy according to its internal placement.
By clicking on the vacancy title, the user goes to the page with the vacancy description:

If interested, the user clicks the “Apply now” button and selects a response option:

- Yourself – create a response from yourself by applying for the relevant vacancy.
- Recommend – suggest another person as a candidate for this vacancy. Requires the user to fill out the required fields of the response form and upload a resume file or other documents of a potential candidate:

If the response is sent successfully, the user receives a response message:

Similar to the process of creating and processing responses of external candidates, the system checks the candidate database for the presence of records by last name, first name, phone number and email address and, if missing, creates a new record, regardless of whether the candidate is an employee or has been recommended. At the same time, if the candidate is an employee, then this information is displayed on the candidate form in the “Current Employee” field as a link to the employee’s record. And if the candidate was recommended, the response form contains information about who recommended them.
This makes it possible to introduce a process of internal search and selection of candidates to fill vacancies in the company or a referral program of recommendations and search.
Who will find it useful?
HR specialists due to:
- Automation of the internal search process and the ability to attract internal candidates to fill important vacancies, as well as the introduction of referral search programs,
- Ensuring transparency in internal career opportunities and increasing employee motivation and loyalty,
- Ability to assess the skills and potential of internal candidates to better determine their suitability for open positions.
All company employees who:
- Want to learn about career opportunities within the company,
- Are looking for new challenges or changes in their professional activities,
- Want to help their friends or colleagues find a suitable vacancy.
Why is it convenient?
Transparency: Employees can easily access all information about internal vacancies.
Convenience: Ability to apply or recommend a candidate directly through the self-service portal.
Speed: Employees can quickly respond to new vacancies and submit their candidacies.
Additional options and features
Filters and search: Possibility of filtering vacancies on the page according to various criteria (for example, by keywords, by relation to the company in which the vacancy is open, or by competency level):

New version of browser extension for creating responses – HCM & LMS Recruiting
What was done?
A new version of the Recruiting extension for SMART HCM & LMS for the Chrome browser has been developed and implemented. This extension allows recruiters to streamline the response creation process by uploading candidate resumes and automatically populating the required form fields with personal information.
How does it work?
A recruiter runs the HCM & LMS Recruiting add-on in the Chrome browser:

They find information about the candidate on the Internet or receive their resume in the form of a file in any way. Then they drag the received or saved file into the “Upload CV” area. Only text file formats are supported. The system automatically recognizes personal data and fills in the required fields:

If first and last names are mistaken, you can quickly swap them by clicking the corresponding button on the form.
For analytics, a search channel is selected from the list, and in the vacancy field, you can quickly find the required vacancy and select several at once, which allows you to optimize the process of creating a response:

The user receives confirmation of the submitted response:

And in case of canceling, you can quickly reset the form by clicking the “Clear” button.
Who will find it useful?
This function will be useful to HR specialists and recruiters who are involved in the search and selection of personnel. It significantly simplifies the process of processing candidate resumes, saves time by recognizing personal data in resumes, and reduces the risk of incorrectly entering candidate data into the system.
Why is it convenient?
Automatic data population: The system automatically recognizes personal data from the resume and fills in the required fields of the form, which reduces the risk of errors.
Easy correction: If first and last names are filled in by mistake, you can quickly swap them by clicking the corresponding button.
Quick vacancy selection: Users can easily search for and select one or more vacancies, streamlining the application process.
Additional options and features
Support for text file formats: The add-on only supports text formats to ensure accurate data recognition.
Search channel analysis: The ability to select a search channel from a list for analytics and tracking the effectiveness of various sources.
User-friendly interface: An intuitive, universal interface that allows you to quickly and efficiently work with candidate resumes.
New “Talent Matrix” page
What was done?
The functionality for the “Talent Management” module, namely a new “Talent Matrix” page, has been developed. It provides managers with information about the breakdown of their team’s employees into talent vectors using the classic 9-Box matrix methodology.
How does it work?
For a manager to have the opportunity to identify and manage the talent pool of their team, they need to go to the “Talent Matrix” page (“Manager’s Account” section).
The Talent Matrix consists of 9 squares formed by the intersection of three levels of Potential (determined based on the results of assessing skills and competencies) and three levels of Efficiency (generalized assessment of goals according to the KPI methodology).

The administration of data and the entry of information displayed on the Talent Matrix is managed by the SMART HCM & LMS System Administrator on the Dynamics side.
The Talent Matrix will contain a list of employees who:
- are assigned a Talent Status and Talent Vector which is not approved by the manager,
- are assigned a Talent Status and Talent Vector which is approved by the manager.

On the “Talent Matrix” tab, on the right, the manager will see a list of employee Talent Statuses for the last current period available on the Talent Matrix:

On the “Talent Matrix” tab, on the right, the manager will see a list of employee Talent Statuses for the last current period available on the Talent Matrix:

Filters are also available for the manager on the page to display a list of employee Talent Statuses on the Talent Matrix:
- for previous periods – “Period” filter:

- for another Subdivision, which is directly subordinate to the manager – the “Subdivision” filter:

Who will find it useful?
The functionality will be useful to managers who need tools to effectively manage their team’s talent pool, as well as to carry out strategic planning for employee development according to the 9-Box Matrix methodology.
Why is it convenient?
- Visualization: Intuitive visualization of information about employee Potential and Efficiency in the 9-Box Matrix format.
- Filtering: Convenient filters for viewing information by different periods and subdivisions.
- Interactivity: The ability to go to a detailed view of employee statuses from the Talent Matrix by clicking on the corresponding square.
- Historical data: Viewing data from previous periods to analyze changes and developments.
New “Ranking” page
What was done?
The functionality of the “Talent Statuses” module has been expanded with a new “Ranking” page. Now it will be easier for managers to analyze, review and make changes to the ranks of employees based on the Talent Statuses and Talent Vectors assigned to them.
How does it work?
On the “Ranking” page (“Manager’s Account” section), the manager will be shown a list of subordinates grouped by subdivisions and according to the latest current period for assessing Talent Status for such employees:
- for which the System Administrator created “Employee Talent Status” records in Dynamics,
- which, according to the results of the Efficiency and Potential assessment, have a Calculated Talent Vector and an Calculated Talent Status assigned to them:

On the “Ranking” page, the manager can:
- make changes to the ranks of one or more subordinates and send them for approval to the System Administrator:

- approve the Calculated Talent Vector and the Calculated Talent Status, without changing, of one or all subordinates:

The manager also can make changes to the ranks of one or more subordinates.
To do this:
- click on one of the buttons: “Increase Employee Talent Vector”/ “Decrease Employee Talent Vector”. Then, in the modal window with information about increasing/decreasing the Potential Level, fill in the “Comment” field, in which indicate the reasoning why the status should be changed, and click the “Change” button to confirm the changes.


To understand for which employees changes have been made, they will be marked with an accent color on the “Ranking” page.

- after changing the ranks of subordinates, they must be sent for approval to the System Administrator by clicking the corresponding “Send for approval” button:

When the System Administrator has analyzed and approved in Dynamics the final Talent Statuses of employees, the manager must review them and confirm this on the Self-Service Portal.
For final approval by the manager, on the “Ranking” page, they will be shown the “Reviewed” button for final approval of Talent Statuses and Talent Vectors.

After the manager clicks on the “Reviewed” button, a modal window will be displayed with a warning that after confirmation, updated Talent Statuses will be displayed to the subordinates on the Self-Service Portal:

To confirm, click the “Approve” button. Then, a modal window will be displayed confirming that the Talent Statuses have been successfully approved:

Who will find it useful?
The functionality will be useful to managers who need tools for effectively managing the talent pool of their team, as well as for making decisions on employee development.
Why is it convenient?
- Convenient ranking: Intuitive interface for assessing employee Potential and Efficiency.
- Flexibility: the ability to change the ranks of subordinates and approve them in real time.
- Transparency: All changes are immediately visible and can be easily tracked. Changes in subordinate ranks are displayed in orange until approved.
- Modal confirmation window: After making changes, the manager can add a comment and confirm the changes through a modal window.
- Final approval: The manager can review the final approved Talent Statuses and confirm them.
Talent Management Module – Searching specialists by skills
What was done?
The functionality of the Talent Management module allows users to search for talent using filters, view profiles, resumes and contacts of potential talents for further booking for a project or task.
How does it work?
A user of the Self-Service Portal who wants to search for Talents should go to the “Talent Management” section on the “Search” page.
The “Search” page will display a list of Talents available for search and subsequent booking.
The user can view information on a short Talent card, namely:
- Photo,
- First and Last Names,
- Positions,
- Rate per hour if it was specified by the Administrator in Dynamics,
- Line with skills possessed by the Talent.

The System Administrator on the Dynamics side is responsible for filling out information about the Talent. The “Employees” directory is filled out, which contains the general information available on the Self-Service Portal. Using the “Resources” and “Resource Prices” directories, the rate per hour is determined for each Talent. Information about skills and their level of proficiency is also provided through the “Skill Levels” directory.
On the Self-Service Portal, the User can use filters to search for talent, namely:
- filter area, where the following filters are available:
– by skills,
– by organizations,
– by rates.
The system makes it possible to use several filters simultaneously, thereby reflecting and forming the percentage of matches:

Sorting by “Best match/Worst match” after receiving search results:

The User can also learn more about the Talent by expanding a specific card.
The Talent card displays the following information:
- Email,
- Phone number,
- Information about Professional Experience and Professional Qualification,
- The “LinkedIn” button: when clicked, the Talent’s personal profile on LinkedIn opens in a new browser window,
- The “Open resume” button, when clicked, a resume file opens in a new browser window for review:

Skills possessed by Talent and their level of proficiency:

After searching for Talents that meet the requirements, you can proceed to create an open request or directly book a specific Talent.
Who will find it useful?
This section will be useful to project managers, HR specialists, team leaders and other users who need an effective tool for managing and selecting talent for various projects and tasks.
Why is it convenient?
Intuitive interface: Easy to search using available filters.
Talent Search: Quickly search for talent using various filters.
Detailed profiles: Ability to view complete talent information, including contacts and professional experience.
“Talent Management” module – Booking specialists for a project or task
What was done?
The functionality of the Talent Management module has been expanded not only by the ability to search for Talents by skill, but also by the ability to immediately book a qualified Talent for a project or task. If no relevant Talent has been found, then users can create an open request to select a specialist or an entire team.
How does it work?
A Self-Service Portal user wishing to book a Talent must go to the “Talent Management” section, the “Search” page.
To generate a booking request, click the “Book” button on a specific Talent card:

On the “Book a Talent” page, the user provides information step by step, namely:
- Fills out two fields “From” and “To”, which should determine the period of work for which the Talent must be booked.
- Next fills out the “Number of Hours” field to determine the specialist’s labor costs and can provide details about the task or project in the “Description” field.For convenience, the completed “Talent” field is displayed on the creation form. The value of this field corresponds to the Talent on the card of which the “Book” button was clicked:

- The user can also add files to the request using the add files area. You need to click the “+Add File” button and select the necessary files from the directory:

- After entering all the information, the User must click the “Send” button. Once saved, the created request will appear first in the list on the “Requests” tab. While the request is being processed, the User can edit and resend it:

If the User was unable to find a Talent that would meet the requirements, then they can create an open request to find a specialist or an entire team.
To create an open request, the user must go to the “Talent Management” section on the “Search” page and click the “+Add Request” button:

On the “Add Request” page, the user provides the information step by step, namely:
- First, in the “Type” field, selects the appropriate type of request from the list – “Project”, “Task” or “Talent”.
- Fills out two fields “From” and “To”, which should determine the period of work for which the Talent must be booked.
- Next, fills in the “Number of hours” field to determine the specialist’s labor costs, and can provide details about the task or project in the “Description” field and add accompanying files:

- After entering all the information, the User must click the “Send” button. Once saved, the created request will appear first in the list on the “Requests” tab. While the request is being processed, the User can edit and resend it:

After the User creates requests on the Self-Service Portal, they go to the System Administrator for further processing. The administrator on the Dynamics side assigns a responsible Account Manager for each request. After which the manager themselves contacts the request initiator and begins work.
On the Self-Service Portal, the User can view the status and assigned responsible account manager, as well as edit created requests in the “Talent Management” section, “Requests” page:

The user has access to filters for sorting and searching for specific requests, namely:
- sorting by “New first/Old first”,
- filter area, where the following filters are available:
- by type,
- by period,
- display of closed requests.
The system allows you to use several filters simultaneously:

Who will find it useful?
This functionality will be useful to project managers, HR specialists, team leaders and other users who need a quick tool for managing and selecting talent for various projects and tasks.
Why is it convenient?
Creating requests: Users can create open requests to select a team or specialist for a project or task.
Booking specialists: The ability to book a specific specialist to work on a task or project.
Intuitive interface: Easy to create, track progress and edit requests.
We hope that the new features of the system will be useful to you and will make it easier to work with people and data in your company!